Demystifying the ADDIE Process: A Beginner’s Guide


If you use narration voice-overs in your training projects, you’re undoubtedly familiar with how difficult it is to find a colleague to help do your voice-over, the challenge of booking their time and scheduling retakes. And not to mention the massive amount of editing during post-production to get the polished, professional voice-overs because it’s tough to listen to a recording full of pops, white noise, and other distractions. The struggle is real. It’s time consuming, long and most times frustrating when there are changes.
A good voice-over must sound human and not robotic.
To overcome some of these challenges, I reverted to using text-to-speech (TTS) software. But using text-to-speech software brings other challenges. I spent countless hours and several dollars trying to find the right tool to do the job. A few themes of challenges I encountered:
Imagine being able to create a human-sounding voice-over in mere seconds.
Everyone can tolerate mediocre voice-overs, but I will rapidly reach for the kill switch on anything that sounds muddy, fuzzy, or annoying. And undoubtedly, if the voice isn’t pristine, learners will get distracted by it and don’t, optimally, focus on the lesson.
![]() Using voice-over narration in my projects is part of my core multi-media toolkit. When I stumbled across Speechelo™, a text-to-speech software, it brought natural human expressions into text-to-speech. It overcame the challenge of finding voice-talent, booking time and scheduling retakes. And eliminated the need for post-production editing.
Using voice-over narration in my projects is part of my core multi-media toolkit. When I stumbled across Speechelo™, a text-to-speech software, it brought natural human expressions into text-to-speech. It overcame the challenge of finding voice-talent, booking time and scheduling retakes. And eliminated the need for post-production editing.
Speechelo™ is the best online text-to-speech conversion software I have found so far.
Using Speechelo™ allowed me to create human-sounding voice-over in mere seconds. The tool is simple to use and intuitive. To create voice-overs, you simply paste your text into online tool and the integrated A.I. engine will run through the text, add punctuation, and insert notations needed to ensure a natural-sounding speech. You can layer in the choice of voice, generate it, and download it as an .mp3 for your projects.
The cost is a one-time fee (USD) for the standard basic plan, which I found affordable. But you have the option to upgrade to Speechelo™ Pro. With the Pro version, users will have a bigger variety of voices to choose from, different accents, a variety of background music, etc. Be mindful, a handful of voices still sound synthetic but it will take time to find the core voices you want to use.
Some of you may think that voice-talent is so much better. And maybe it is, but this is the next best option.
Try adding Speechelo™ to your multi-media toolkit. It’s saved me time, eliminated massive amounts of editing during post-production, definitely increased my productivity, and provided that professional, polished narration to my projects.
That phrase may be cliché, but it is one all designers should live by. Images have the power to attract, to persuade, and to engage your audience. Images can make any design more powerful and enrich your content.

Image. Courtesy of Georgie Cobbs
Images are processed 60,000 times faster than text. People remember 10 percent of what they hear, 20 percent of what they read, and 80 percent of what they see.
The power of visual communication has rocketed with the rise of digital and social media. An image in your design can help you connect with the audience and make a strong impression even before they’ve even read a single word.
Adding images to your work can make all the difference in your design. Keep it in mind when planning your next project.
It’s central to the skills of a designer. But typography is much more than the “design” of the typeface and characters. It also includes the arrangement of the letters and characters, the point size, line length, the spacing between characters, and lines.

Image. Courtesy of Runyu Xia
When you realize how much thought that goes into carefully selecting a typeface, it will become easier to recognize the differences between typefaces, and understand why they might’ve been chosen in the first place.
All graphic design projects start with the composition and layout. This gives your project structure, and determines which concepts work well together to obtain your desired result.
It can attract attention, organize content, emphasize elements, evoke emotion and help a design look aesthetically pleasing.

Without knowing the fundamentals of colour, you can spend hours trying to find the colour combinations for your project. These are hours you can spend on more important tasks on a project.
I found the following video as a great refresher. If you’re new to visual design, it can help you overcome hurdles and help you better plan your designs with amazing colour combinations.
This is great feature to apply if you have a certificate of completion at the end your project or if you want to personalize it using the participants name.
Level of difficulty: Easy
1. Select your first slide in slide view.
2. From the Insert tab, go to the Interaction Objects group.
![]()
3. Click the Input button.
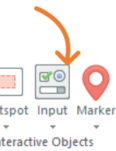
4. From the options, click Text Entry Field from Data Entry category.

5. Place the text entry field in your slide.
![]()
You can apply these optional steps
• Rename the object in your timeline. For example, ParticipantName
• Change the properties of the object. For example, font type, size, or color
1. Go to the Triggers panel and click the click the Manage Project Variables button
![]()
2. The Variables window will appear. Notice a Variable is auto-generated when you created the Text Entry Field
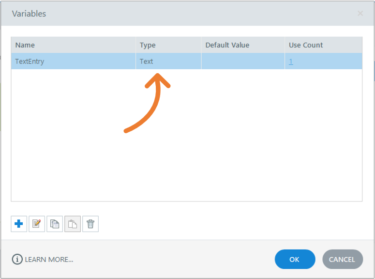
3. Double-click the variable.
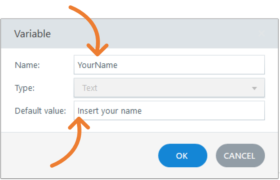
4. Refer to the variable Name and Default value fields and rename and add a default value. For example, YourName in the variable Name field and Insert your name in the Default value field.
Keep this variable name in mind. You will need to refer to this later in the project.
6. Click the OK button to close the Variable window.
7. Click the OK button to close the Variables window.
1. Select a slide where you want the data to be displayed
2. Click the Insert tab
![]()
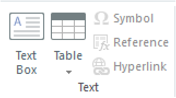
3. From the Text group, click text box and insert it on our slide.
 Important. Make sure your cursor is blinking in the text box.
![]()
4. Refer to the Insert tab
![]()
5. From the Text group, click the Reference button – a reference window will appear.

6. Select the Variable name. For example, YourName.
7. Click the OK button
8. The Variable will auto-populate in the text box.
![]()
9. Save and preview your project.
Did you find this useful? We need your support to empower others like you through learning.
By applying this feature in your design, you’re making sure your learners don’t:
• Skip ahead by clicking the built-in next button
• Jump from one topic to the other using the built-in navigation menu
Only until the timeline has completed, the learner can move to the next page of their learning. Before following these steps, have your project ready with all your pages built and be in slide view.
Level of difficulty: Intermediate

1. Select your first slide in slide view.
2. From the HOME tab, click the Player button from the Publish section – the Player Properties window will appear.
![]()
3. Click the Menu button from the Data section. You will see a list of all your pages.
![]()
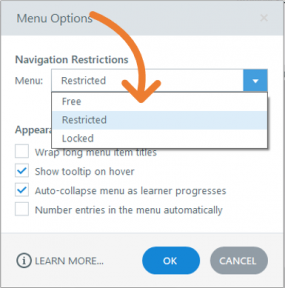
4. Click the gear icon for additional options – a Menu Options window will appear.
![]()
5. From the menu dropdown, select Restricted. When selecting Restricted, you allow the learner to jump to previous slides but not jump ahead. If you were to select Locked, learners can’t jump back or forward.
6. Click OK to close the Menu Options window.
7. Click OK to close the Player Properties window.
1. Click on the VIEW tab.
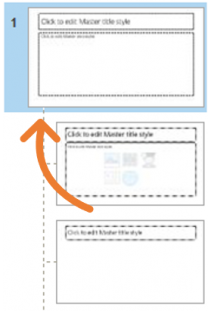
2. Open the slide master by clicking the Slide Master button.
![]()
3. Select the Master slide or Parent slide. Do not select the individual layouts.
4. Refer to the Triggers panel and click the Manage Project Variables button – the variables window will appear.
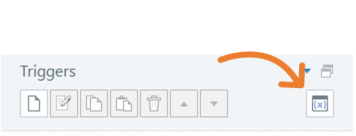
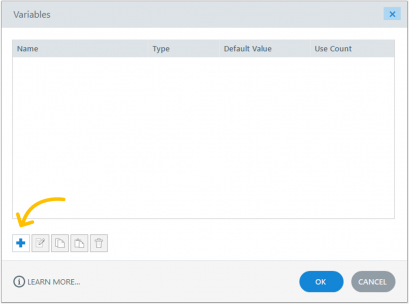
5. In the Variables window, click the “+” button to add a variable – a variable pop-up window will appear.
![]()
6. Enter the following:
• Name: For example, GoNext
• Type: True/False
• Default value: False
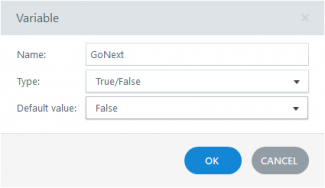
7. Click the OK button to close the Variable window
8. Click the OK button to close the Variables window
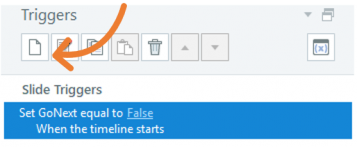
Trigger 1
1. Refer to the Triggers panel.
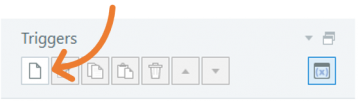
2. Click the Create a new trigger button – A Trigger Wizard window will appear.
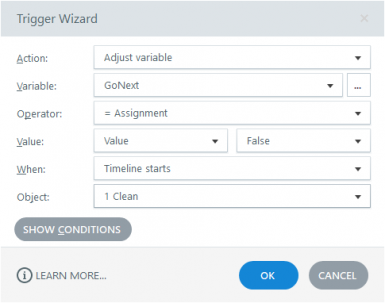
3. Enter the following:
• Action: Adjust variable
• Variable: Select the newly created variable. For example, GoNext
• Operator: = Assignment
• Value: Value; False
• When: Timeline starts
• Object: Select the Slide Master (make sure you do not select from the drop-down any of the object on the slide)
4. Click OK to close the Trigger Wizard window.
Trigger 2
1. Refer to the Triggers panel.
2. Click the Create a new trigger button – A Trigger Wizard window will appear.
3. Enter the following:
• Action: Adjust variable
• Variable: Select the newly created variable. For example, GoNext
• Operator: = Assignment
• Value: Value; True
• When: Timeline ends
• Object: Select the Slide Master
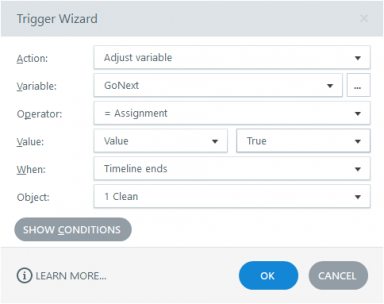
4. Click OK to close the Trigger Wizard window.
5. Close the slide master by clicking the Close Slide Master View button from the Slide Master tab.

1. Select the first slide.
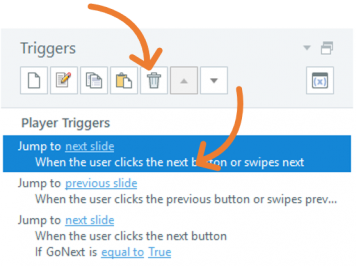
2. Refer to the Triggers panel.
3. Double click Jump to next slide trigger – the Trigger Wizard window will appear.
4. Click the Show Conditions button.
5. Click the “+” button to add a new “add” or “or” condition – the Add Trigger Condition window will appear.
6. Enter/select the following:
• List: Variable
• If: GoNext
• Operator: == Equal to
• Type: Value
• Value: True
7. Click the OK button to close the Add Trigger Condition window.
8. Click the OK button to close the Tigger Wizard window.
1. Refer to the Triggers panel on your first slide.
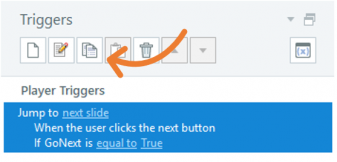
2. Highlight your Trigger with the new condition and click the Copy the Selected Trigger button.
3. Highlight your other slide by selecting your slide, press the SHIFT key, and click the last slide.
4. When all your slides are selected, press CTRL + V to paste the trigger with the new condition.
5. Visit each slide to verify the new trigger was pasted into it. Notice in each slide you should have two triggers to jump to next slide. They should include the original trigger without the condition and the new trigger with the condition.
6. Delete the original jump to next slide trigger each slide by highlighting the trigger and clicking the Delete the Selected Trigger button.
7. Save and preview your project.
8. Publish to SCORM or AICC.
Did you find this useful? We need your support to empower others like you through learning.
Building on my previous posting, having forced interactions, like watching a video, is great. Having forced interactions ensures your learners are visiting all the content before going forward with their training.
Before following these steps, have your video object in your project. As you go through the steps, notice similarities and patterns from my previous posting. This will help build your skills using storyline for future projects.
Level of difficulty: Intermediate
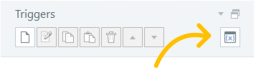
1. Refer to the Triggers panel and click the Manage project variables button to create a new variable – A variables window will appear
2. Click the “+” button to create a new variable – A variable pop-up window will appear
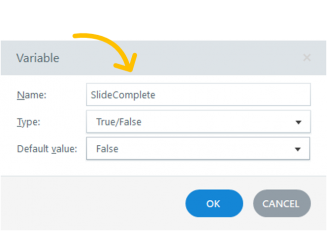
3. Input the following:
• Name: (for example, SlideMovieComplete)
• Type: True/False
• Value: False

4. Click the OK button
1. Refer to the Triggers panel
2. Click Create a new Trigger button – The trigger Wizard window will appear
3. Input/select the following:
• Action: Adjust Variable
• Variable: SlideMovieComplete
• Operator: = Assignment
• Value: Value; True
• When: Media completes
• Object: {select the name of your movie}
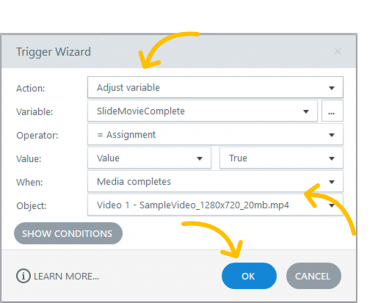
4. Click the OK button
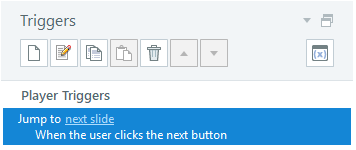
1. Refer to the Triggers panel
2. Click Create a new Trigger button – the Trigger Wizard window will appear
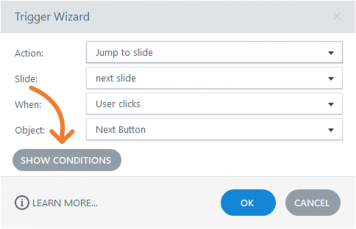
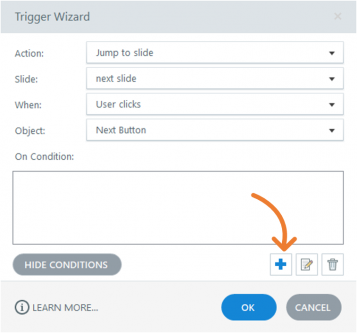
3. Input/select the following in the Trigger Wizard:
• Action: Jump to slide
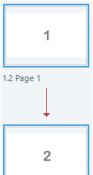
• Slide: next slide
• When: User clicks
• Object: Next Button
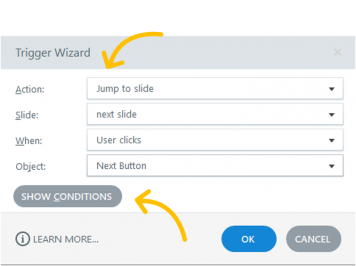
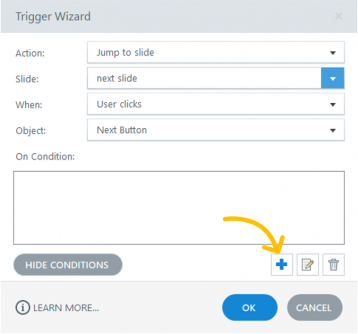
4. On Condition, click the “+” button (Add a “New” or “Or” condition) – the Add Trigger Condition pop-up window will appear
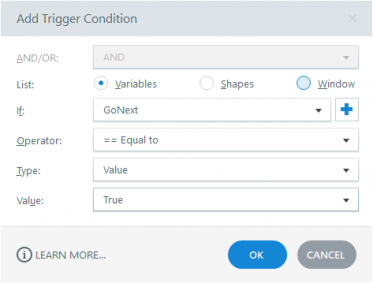
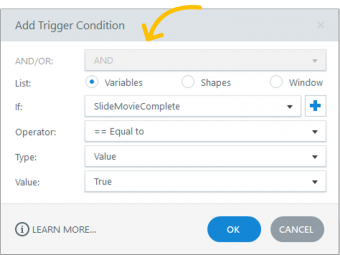
5. Input/select the following:
• List: Variable
• If: SlideComplete
• Operator: == Equal to
• Type: Value
• Value: True
6. Click the OK button to close the Add Trigger Condition pop-up window
7. Click the OK button to close the Trigger Wizard window
8. Save your project
9. Publish your project to AICC or to SCORM
Did you find this useful? We need your support to empower others like you through learning.
This is a great feature when you want forced interactions in your page before the learner can go to the next page.
Before you begin and applying these steps in your project, create buttons on your slide with visited states and pop-up layers. To learn how, visit my other posting here.
Level of difficulty: Intermediate
1. Refer to the Triggers panel and click the Manage project variables button to create a new variable – A variables window will appear
2. Click the “+” button to create a new variable – A variable pop-up window will appear
3. Input the following:
• Name: (for example, SlideComplete)
• Type: True/False
• Value: False
4. Click the OK button
An example of a specific event would be when the user clicked all the buttons.
1. Refer to the Triggers panel
2. Click Create a new Trigger button – The trigger Wizard window will appear
3. Input/select the following:
• Action: Adjust Variable
• Variable: SlideComplete
• Operator: = Assignment
• Value: Value; True
• When: State
• On: Select all the named buttons on the slide
• Are: Visited
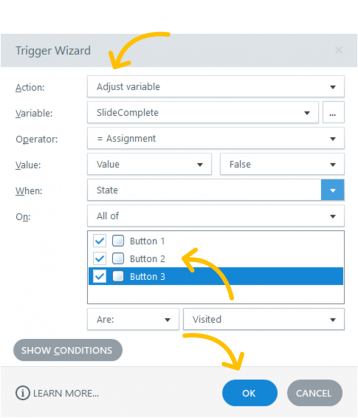
4. Click the OK button
1. Refer to the Triggers panel
2. Click Create a new Trigger button – the Trigger Wizard window will appear
3. Input/select the following in the Trigger Wizard:
• Action: Jump to slide
• Slide: next slide (or name of a preferred slide)
• When: User clicks
• Object: Next Button
4. On Condition, click the “+” button (Add a “New” or “Or” condition) – the Add Trigger Condition pop-up window will appear
5. Input/select the following:
• List: Variable
• If: SlideComplete
• Operator: == Equal to
• Type: Value
• Value: True

6. Click the OK button to close the Add Trigger Condition pop-up window
7. Click the OK button to close the Trigger Wizard window
8. Save your project
9. Publish your project to AICC or to SCORM
Did you find this useful? We need your support to empower others like you through learning.