Storyline 3: Creating an Agree & Comply in your project
One of the many requests I see from clients is to have an employee review a pdf document, confirm agreement by clicking a checkbox, and having a submit button appear.
These requests are usually from Human Resources when they want their employees to track onboarding activities like policies and procedures in their learning platforms.
Before you begin
- You will need your pdf document uploaded to your intranet/internet
- The full hyperlink to the uploaded pdf document. Keep this on-hand. You will need it when applying the Web Object
Follow the steps. Click to expand.

Create a new project
1. Click New Project
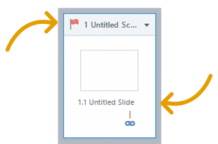
2. In Story View, rename your Scene by double-clicking the scene name field and the slide name field
3. Save your project by clicking File, selecting Save As
Inserting Freeform Question slide
1. From Story View, click the Slides tab
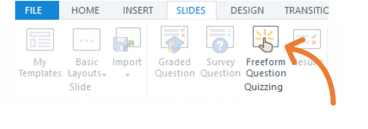
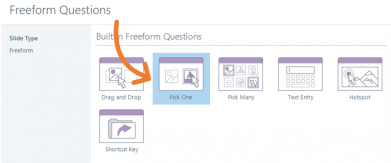
2. Click Freeform Question from the quizzing section – the Freeform Questions window will appear
3. From the options, select Pick One
4. Click the Insert Slide button – a new slide will appear named Pick One
5. Ensure the Pick One slide is selected
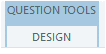
6. Click the Design (Question tools) tab
7. From the Display section, apply the following values:
Feedback: None
Shuffle: None

Inserting Results Slide
1. Click the Slides tab
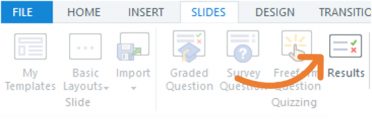
2. Click Results from the quizzing section – the Results window will appear
3. From the options, select Blank Results Slide
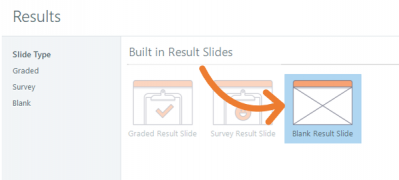
4. Click the Insert Slide button – The Results Slide Properties window will auto-open
5. From the Results Slide Properties window, ensure the Pick One slide is check-marked
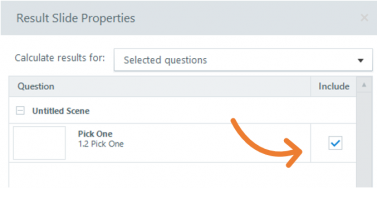
6. Click the OK button
![]()
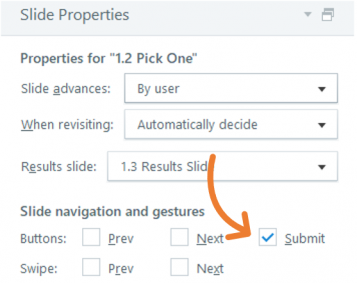
Modifying Slide navigation and gestures
1. Go to Story View
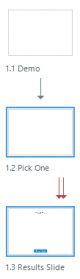
2. Highlight the Pick One and Results slides (CTRL + Mouse-click)
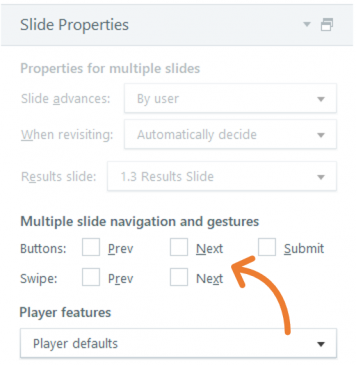
3. Go to Slide Properties panel and refer to Slide navigation and gestures
4. Ensure the following is unchecked:
• Prev
• Next
• Submit
Inserting the Web Object
1. From Story View, double-click the Pick One slide to be in slide view
2. Click the Insert tab
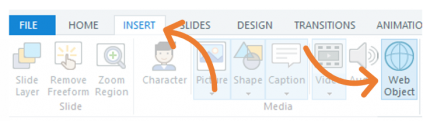
3. Click the Web Object button from the Media section – an Insert Web Object window will appear
4. Refer to your uploaded pdf document - type or copy & paste the URL of it in the Enter a Web address field
5. Click the Test Link… hyperlink to test for errors in the URL
6. Choose between Display in slide or Display in a new browser window from How do you want to display the web object? Choose Display in slide
7. Place a check-mark beside Load web object automatically from How should this web object behave?
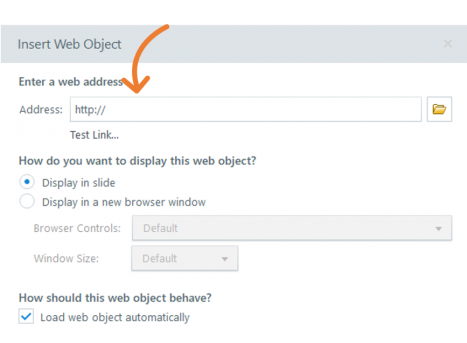
8. Click the OK button – The web object will be placed on the slide
9. Click and drag the object to adjust the dimensions leaving space below the slide
Modifying the Freeform Question slide
Inserting the Interactive Object
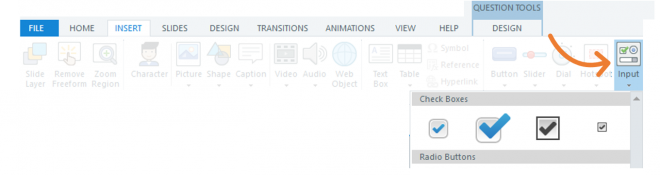
1. Click the Insert tab
2. Click the Input button from the Interactive Objects section
3. Select a checkbox – any style
4. Insert the Input checkbox in your slide
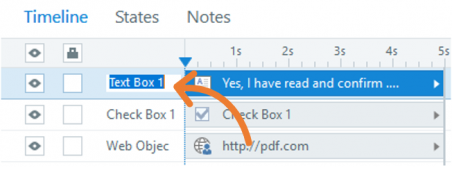
Creating a text box
1. Click the Insert tab
2. Click Text Box from the Text section
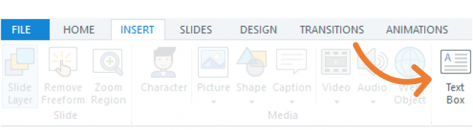
3. Insert the textbox in your slide
4. Insert text – for example, Yes, I have read and confirm ….
5. Click the text box to highlight the object in your Timeline
6. Go to your Timeline, double-click the name-field and name the text object
Modifying the Form View
1. Refer to the Question panel
2. Click Form View
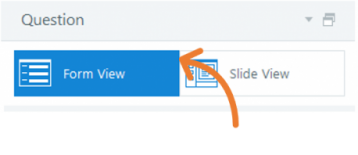
3. The Form View window will appear
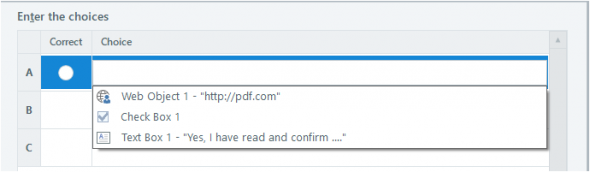
4. Refer to choice and click in the Choice field – A drop-down will appear displaying the list of objects on the slide
5. Select the Check Box 1
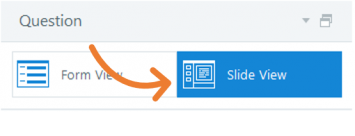
6. Refer back to the Question panel and return to Slide View
Insert a layer with a submit button
1. Refer to the Slide Layers panel
2. Click New Layer
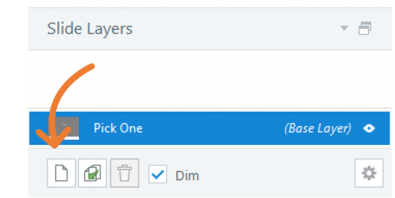
3. Double-click the layer to enable the name field and rename your layer
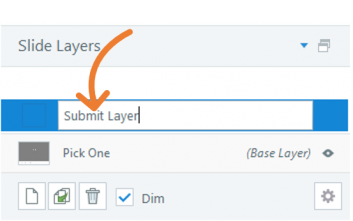
4. Ensure your renamed layer is highlighted
5. Click the Insert tab
6. Click Button from the Interactive Objects section

7. Choose a button from the choices and insert it to your slide layer
8. Right-clicking the button and select Edit Text from the dropdown list
9. Label your button (for example, Submit)
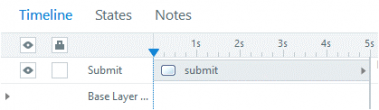
10. Name the button in your Timeline by selecting the button in the slide layer to highlight it in your Timeline
11. Double-click the name-field in the Timeline and rename the object's name
Adding two triggers to the submit button in the layer
Trigger 1
1. Select the Submit button
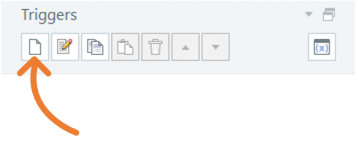
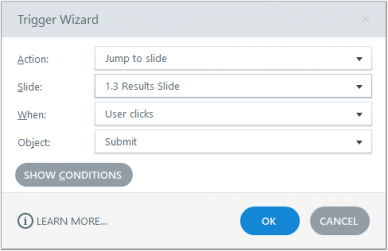
2. Refer to the Triggers panel and click Add trigger hyperlink - the Trigger Wizard window will appear

3. Apply the following values to the fields in the Trigger Wizard and click the OK button
• Action: Jump to Slide
• Slide: Select Results slide
• When: User clicks
• Object: Submit
Trigger 2
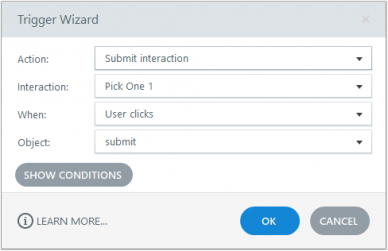
1. From the Triggers panel, click Create a new trigger button - the Trigger Wizard window will appear
2. Apply the following values to the Trigger Wizard fields and click the OK button
• Action: Submit interaction
• Interaction: Pick One
• When: User Clicks
• Object: Submit

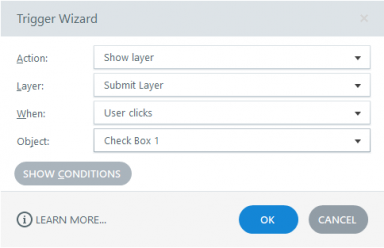
Adding a trigger to the checkbox
1. Make sure you are on your main Slide View and not in your layers view. Check by going to your Slide Layers panel and verifying if your (Base Layer) is selected
2. Click the checkbox object on your slide
3. Refer to the Triggers panel and click Add trigger hyperlink - The Trigger Wizard window will appear
4. Apply the following values to the fields in the Trigger Wizard and click the OK button
• Action: Show Layer
• Layer: Select the layer you would like to appear. This would be the layer with the submit button
• When: User clicks
• Object: Name of the button object
Modify the Results slide
By default, Storyline will add a Review Quiz button on the Results slide. In this scenario, the Review Quiz button is unnecessary and we can modify it.
Modify the Review Quiz button to an Exit button
1. Click the Review Quiz button and right-click the button
2. Select Edit Text from your dropdown list
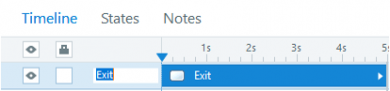
3. Label your button to Exit
4. Click the Exit button on the slide to highlight the object in your Timeline
5. Double-click the name field in the Timeline
6. Rename the object's name
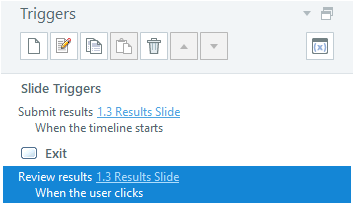
Modifying the Trigger on the Exit button
1. Click the Exit button on the slide to highlight the object in your Trigger Wizard window
2. Double-click the trigger, Review Results …when user clicks – the Trigger Wizard window will appear
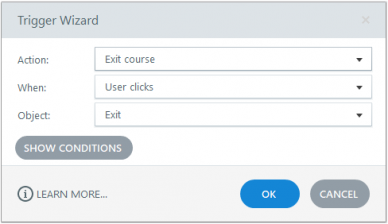
3. From the Trigger Wizard panel, refer to the Action dropdown
4. From the dropdown, select Exit Course
5. Click the OK button
6. Save your work
7. Publish your project to SCORM or AICC
Did you find this useful? We need your support to empower others like you through learning.
[wpedon id=”1451″ align=”center”]